Interfacing Water Level Sensor with ATmega2560 Development Board
Introduction
In this guide, we will learn how to interface a water level sensor with an ATmega2560 microcontroller. The water level sensor is used to detect the water level in a container or tank. By measuring the analog output of the water level sensor using the ATmega2560's ADC, we can monitor the water level and use it for various automation purposes.
Problem Statement
The goal is to interface the water level sensor with an ATmega2560 microcontroller, to accurately measure the water level in a container or tank using the analog output of the water level sensor. The measured water level will be used for monitoring purposes.
Requirements
To successfully complete this project, you will need the following components:
- ATmega2560 development board.
- Water level sensor.
- Micro USB cable
- Breadboard.
- Jumper Wires.
- Potentiometer (Built-in)
- 16X2 LCD
Connection Diagram
- For LCD connection, refer to this page.
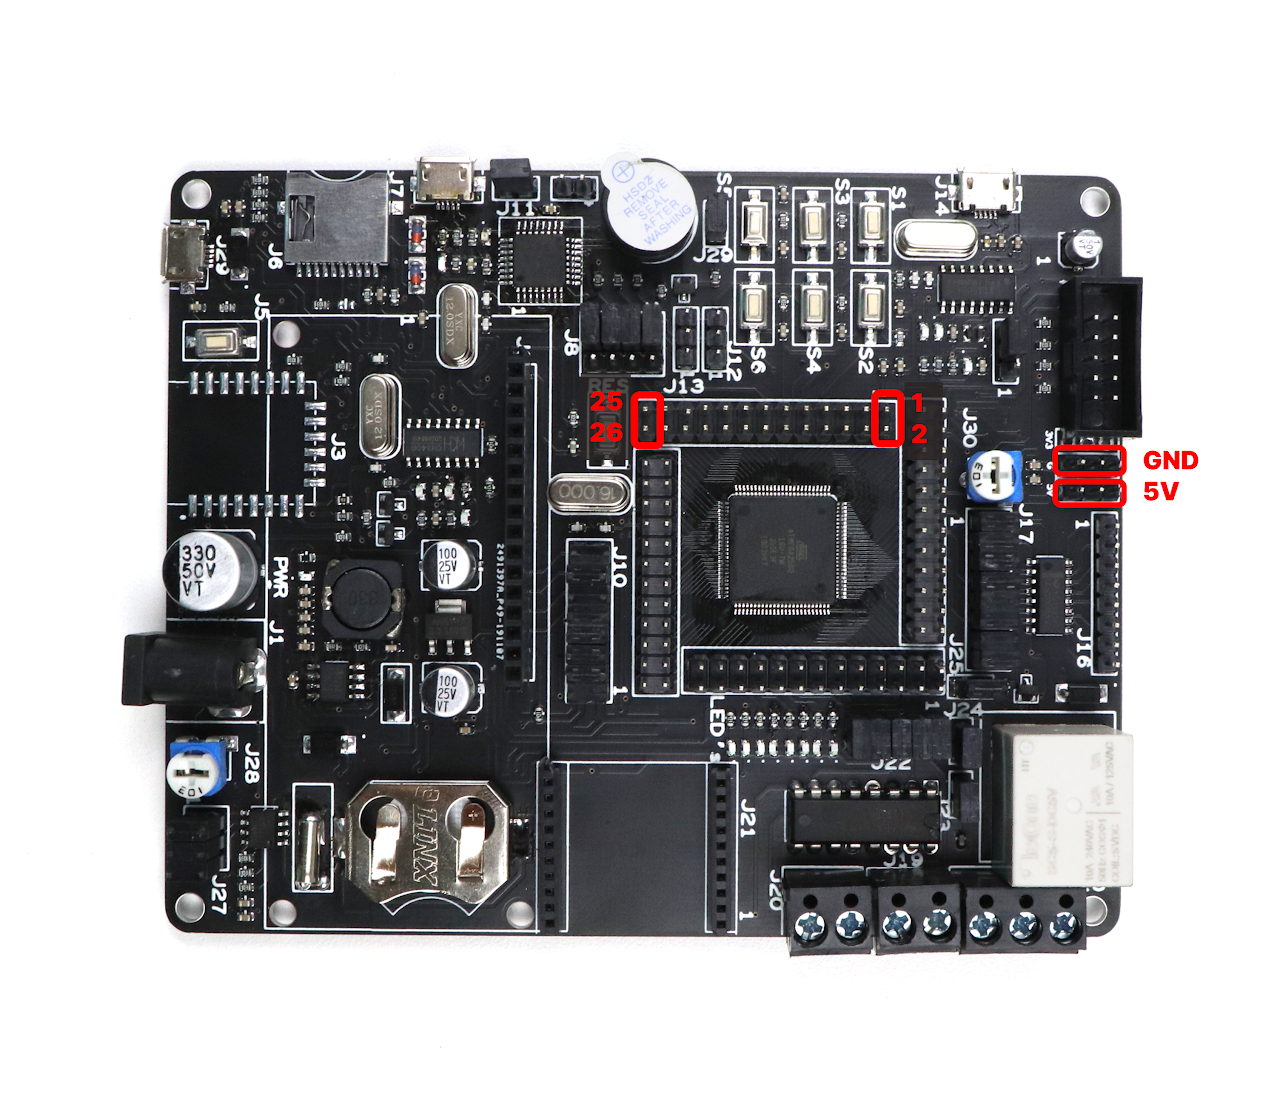
- Connect VCC of water level sensor to 5v of the ATmega2560 development board.
- Connect GND of water level sensor to GND of the ATmega2560 development board.
- Connect signal pin of the water level sensor to the ADC0, Pin 0 of the port F (Pin 97)of ATmega2560 development board

Code
- Open VS Code and paste the code into the file named waterlevel.c
- Additionally, add the library for LCD into the workspace of your project, which along with the main code can be found here.
- To compile and convert this into hex run the following command in your terminal-
avr-gcc -Wall -g -Os -mmcu=atmega2560 -o waterlevel.hex waterlevel.c#define F_CPU 16000000UL
#include <avr/io.h> //Defines pins, ports, etc.
#include <util/delay.h> //Defines delay functions
#include <stdio.h> //Defines sprintf function
#include <util/delay.h> //Defines delay functions
#include <stdlib.h> //Defines dtostrf function
#include <string.h> //Defines strcat function
#include "lcd.c" //Include LCD header file
static inline void initADC0(void)
{
ADMUX |= (1 << REFS0); // reference voltage on AVCC
ADCSRA |= (1 << ADPS1) | (1 << ADPS0); // ADC clock prescaler /8
ADCSRA |= (1 << ADEN); // enables the ADC
}
int main(void)
{
float value; // variable to store ADC value
char data[20];
LCD_Init(); /* Initialize LCD */
LCD_Clear(); /* Clear LCD */
initADC0(); // initialize the ADC
while (1)
{
LCD_gotoxy(0, 0); /* Enter column and row position */
LCD_string("Level = "); // display string on LCD
ADCSRA |= (1 << ADSC); // start ADC conversion
loop_until_bit_is_clear(ADCSRA, ADSC); // wait until ADC conversion is done
value = ADC; // read ADC in
value = (value * 100) / 1023; // convert ADC value to percent
dtostrf(value, 3, 2, data); // convert float to string
strcat(data, "% "); /* Concatenate unit of % */
LCD_gotoxy(8, 0); // enter column and row position
LCD_string(data); // display data on LCD
_delay_ms(500); // wait a bit
LCD_Clear(); // clear LCD
}
return 0;
}- Now open AVRDUDES and from the Programmer (-c) dropdown select Any usbasp clone with the correct VID/PID
- In the Flash section, click on three dots and navigate to the desired hex file, and select it. Finally, click on Program to burn the hex file in the microcontroller.
Output
After uploading the code to the ATmega, the program will continuously monitor the water level. The LCD will display the readings from the water level sensor. Adjust the water level in the container or tank (by partially dipping or fully immersing the sensor) and observe the changes in the displayed readings. Note these values and use them in your application to do automation tasks.
Conclusion
In this guide, you have learned how to interface a water level sensor with an ATmega2560 development board. By reading the analog output of the water level sensor using the ATmega 2560's ADC, you can monitor the water level in a container or tank. This information can be used for automating tasks, such as controlling water pumps, sending notifications, or displaying the water level on a user interface. Experiment with different water levels and observe the corresponding analog readings to understand the behavior of the sensor and its applications in your projects.