Interfacing XBEE for UART communication with Raspberry Pi
Introduction
Problem Statement
Using XBEE verify UART communication with Raspberry Pi.
Requirements
- Raspberry Pi
- XBEE - S2C(2 XBEE'S)
- USB to serial converter - 2
- Jumper wires
Working
To verify UART communication with a Raspberry Pi using XBee modules, we begin by connecting the XBee module to the appropriate UART pins on the Raspberry Pi. We configure the Raspberry Pi's UART settings, such as baud rate and parity, to match the settings of the XBee module. Once the hardware setup is complete, we can write a Python program to establish communication with the XBee module using the Raspberry Pi's UART interface. This program sends and receives data to and from the XBee module, confirming the successful functioning of UART communication. By observing the data exchange between the Raspberry Pi and the XBee module, we can verify that the UART communication is working correctly, ensuring a reliable and efficient wireless communication setup using XBee modules with the Raspberry Pi.
Setting up Raspberry Pi for Serial Communication
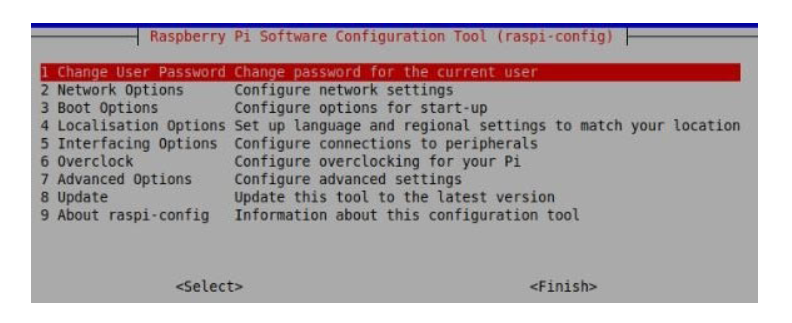
Setting up Raspberry Pi for Serial Communication In the terminal, run the command "sudo raspi-config", the settings tab for enabling might be slightly different but follow the keys as mentioned.
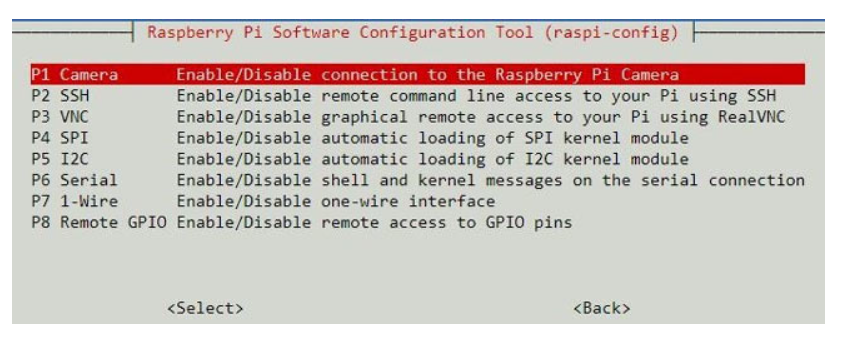
Go to option Interfacing options and hit the enter. Now, select the Serial option and Enable it and then save.
Configure XBEE modules using XCTU
To connect XBEE module with the laptop, a USB to serial converter is used.
Download the XCTU software for Windows or Linux and install it. After downloading and installing the XCTU software, open it and make sure your XBee module is properly connected. Check the COM port in the Device Manager->Check the COMX (X->number) under PORT.
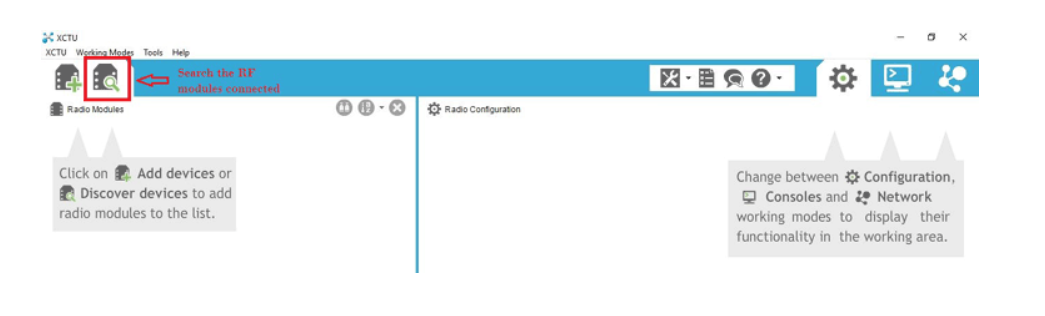
Open the application after downloading it.
The transmitting(connecting) XBEE is connected directly to one PC/laptop and the receiver(end device) is connected to Raspberry Pi connected directly/indirectly to same PC/laptop(if the above approach does not work configure transmitting and receiving XBEE's to 2 different PC/laptop).
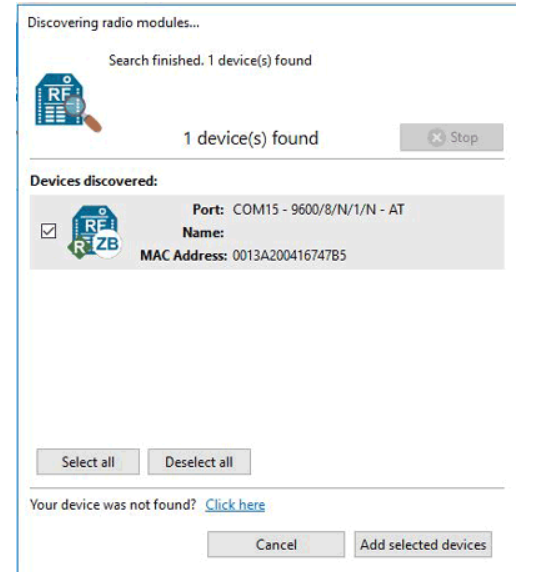
- Now, click on the search button. This will show you all the RF devices connected with your laptop. In our case, it will show only one XBee module.
- Select the Serial port.
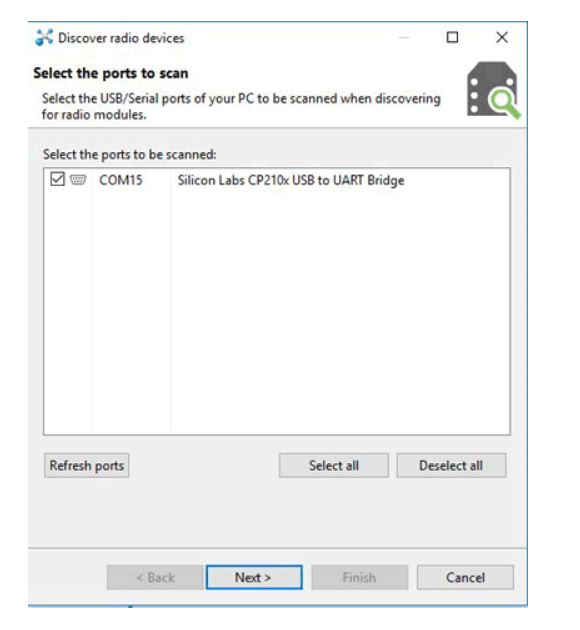
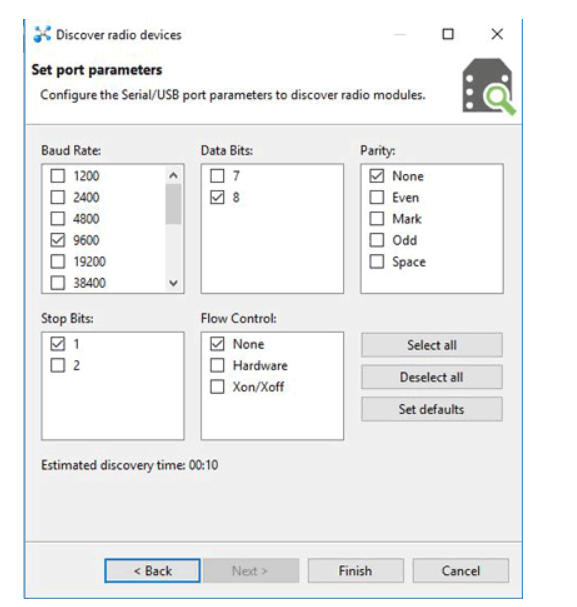
- In the next window, set the USB port parameters as shown below and click on Finish.
- Select the Discovered device and click on Add selected device. This process will add your XBee module to XCTU dashboard.
- Now, you can configure your XBee module in this window. You can use either AT commands or put the data manually. As you can see, there is R showing on the left panel which means XBee is in router mode. We have to make it Coordinator for the transmitter part.
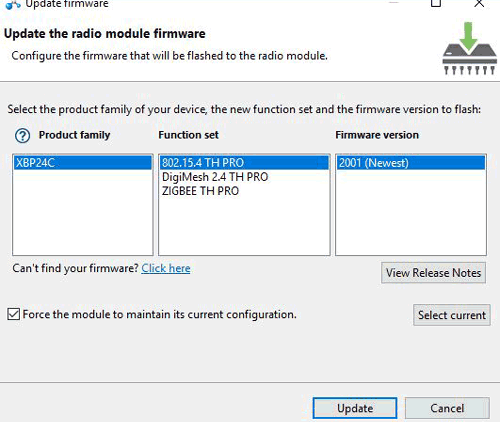
First, update the Firmware by clicking on the Update firmware.

- Choose the Product family of your device which is available on back of your XBee module. Select function set and firmware version as highlighted below and click on Update.
- Now, you have to give ID, MY and DL data to make connection with other XBee. ID remains same for both the modules. Only MY and DL data interchange i.e. MY for the receiver XBee becomes DL of the transmitter XBee (coordinator) and DL for the receiver XBee becomes MY of the transmitter XBee. Make CE as Coordinator and then hit the Write button. As shown below.
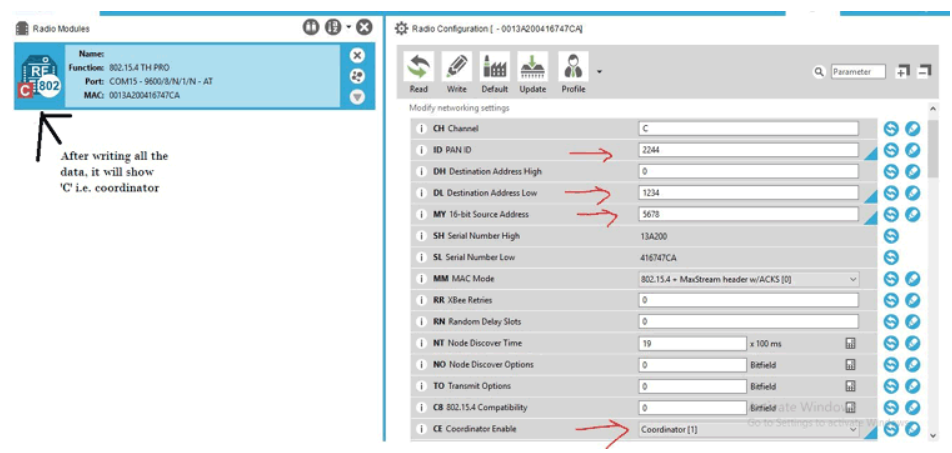
XBee 1 coordinator
- DL- 1234
- MY-5678I
- ID-2244
XBee 2 end device
- DL-5678
- MY-1234
- ID-2244
After writing the above data to the transmitter part, plug in the second XBee module in it. Repeat the same process as above only changes are the DL, MY, and CE. As we will make the second XBee as End device so in CE drop down menu, select the End device and hit the Write button.
Now, our XBee modules are ready to interface with the Raspberry Pi. We will connect the transmitter XBee to the laptop and receiver XBee with the Raspberry Pi. Then give commands to the receiver part using laptop.
Circuit Diagram
(End device XBEE connection to Raspberry Pi)
- Connect the XBee module to the RPi using a USB to serial converter (similar to how the first XBee was connected to the laptop)

Testing Wireless XBEE Communication with Raspberry Pi connected XBEE
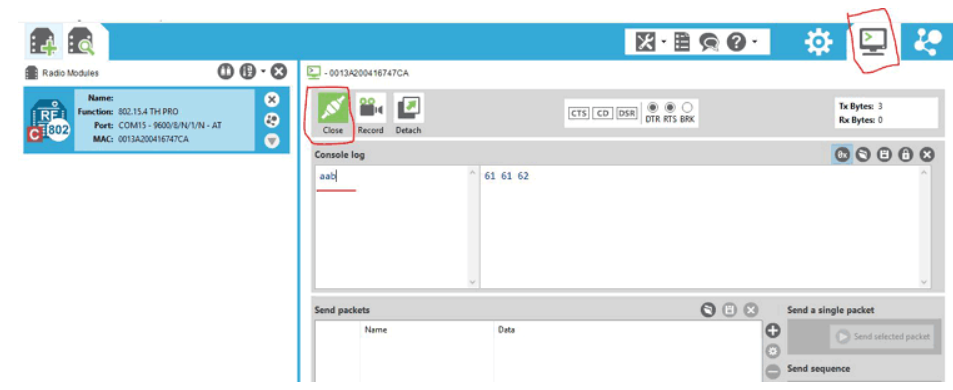
Now, we all set to test our XBee transmitter and receiver. To give command to the transmitter part, we will use XCTU’s console terminal. Click on the Console icon near the settings option. Then, click on Open button to connect the XBee to the laptop.
Enter ‘a’ in Console log. You will see that LED will turn ON for 3 seconds and then it turn OFF.
Code
Now let's write the Python code for UART. Follow the steps below:
- Connect to your Raspberry Pi using VNC or Desktop environment.
- Launch the Geany Python IDE or open a text editor to write the code.
- Create a new file named
uart.pyand save the following code into it - You can copy and paste the following code from here into the file.
#!/usr/bin/env python
import time
import serial
import RPi.GPIO as GPIO

GPIO.setmode(GPIO.BCM)
GPIO.setwarnings(False)

ser = serial.Serial(
    port='/dev/ttyS0',  # Corrected the serial port path
    baudrate=9600,
    parity=serial.PARITY_NONE,
    stopbits=serial.STOPBITS_ONE,
    bytesize=serial.EIGHTBITS,
    timeout=1
)

counter = 0

while True:
    ser.write(str.encode('Write counter: %d \n' % counter))
    time.sleep(1)
    counter += 1
    print("Counter value = ", counter)
    x = ser.readline().strip().decode()  # Decoded the received data to string
print("Message receuved from coordinator = ", x)- After saving the file execute it by clicking on messenger like icon on geany editor or open terminal and navigate to the folder you saved the file, execute it by typing python
uart.py - While running the code, by default the counter value will be printed. By sending a message from the coordinator, you can verify whether the message is received by the second Xbee module.
Output
You should be able to see the data sent from the console log of the Connector XBEE to the End Device XBEE connected to Raspberry Pi and the data displayed on terminal.
Conclusion
By following this guide, you have learned how to use XBee modules for UART communication with a Raspberry Pi. You have configured the XBee modules using XCTU, wired them to your Raspberry Pi, and written the necessary Python code to establish a reliable communication link between devices. This opens up a wide range of possibilities for your Raspberry Pi projects that require wireless communication.
With XBee modules, you can easily exchange data between multiple Raspberry Pis or other devices over a wireless network. You can create remote control systems, sensor networks, or even build interactive projects that communicate wirelessly. The flexibility and reliability of XBee modules make them a valuable addition to your Raspberry Pi toolkit.
By integrating XBee modules into your projects, you can extend the functionality and create more advanced applications.
The combination of Raspberry Pi and XBee modules gives you the power to create robust and versatile wireless solutions.