Interfacing DHT11 Sensor with ESP32 using ESP-IDF
Introduction
This guide provides step-by-step instructions on how to interface a DHT11 temperature and humidity sensor with an ESP32 microcontroller. The DHT11 sensor can measure temperature and humidity and provide the readings through a digital interface. By connecting the sensor to the ESP32 and using the provided code, we can read and display the temperature and humidity values.
Problem Statement
Interface the DHT11 sensor with the ESP32 microcontroller and display the temperature and humidity readings on the serial monitor.
Requirements
To successfully complete this project, you will need the following components:
- ESP32 development board
- DHT 11 Sensor
- Jumper wires
- Breadboard
About DHT11
- The DHT11 sensor is a widely used digital temperature and humidity sensor module capable of measuring ambient temperature and relative humidity in various applications.
- Temperature Measurement: The DHT11 sensor can measure temperature within a range of 0°C to 50°C (32°F to 122°F) with a typical accuracy of ±2°C.
- Humidity Measurement: It can measure relative humidity within a range of 20% to 90% RH with a typical accuracy of ±5%.
- Digital Output: The sensor provides a digital output, making it easy to interface with microcontrollers and digital systems. It uses a single-wire communication protocol, where the data is transmitted serially and can be read using a simple software routine.
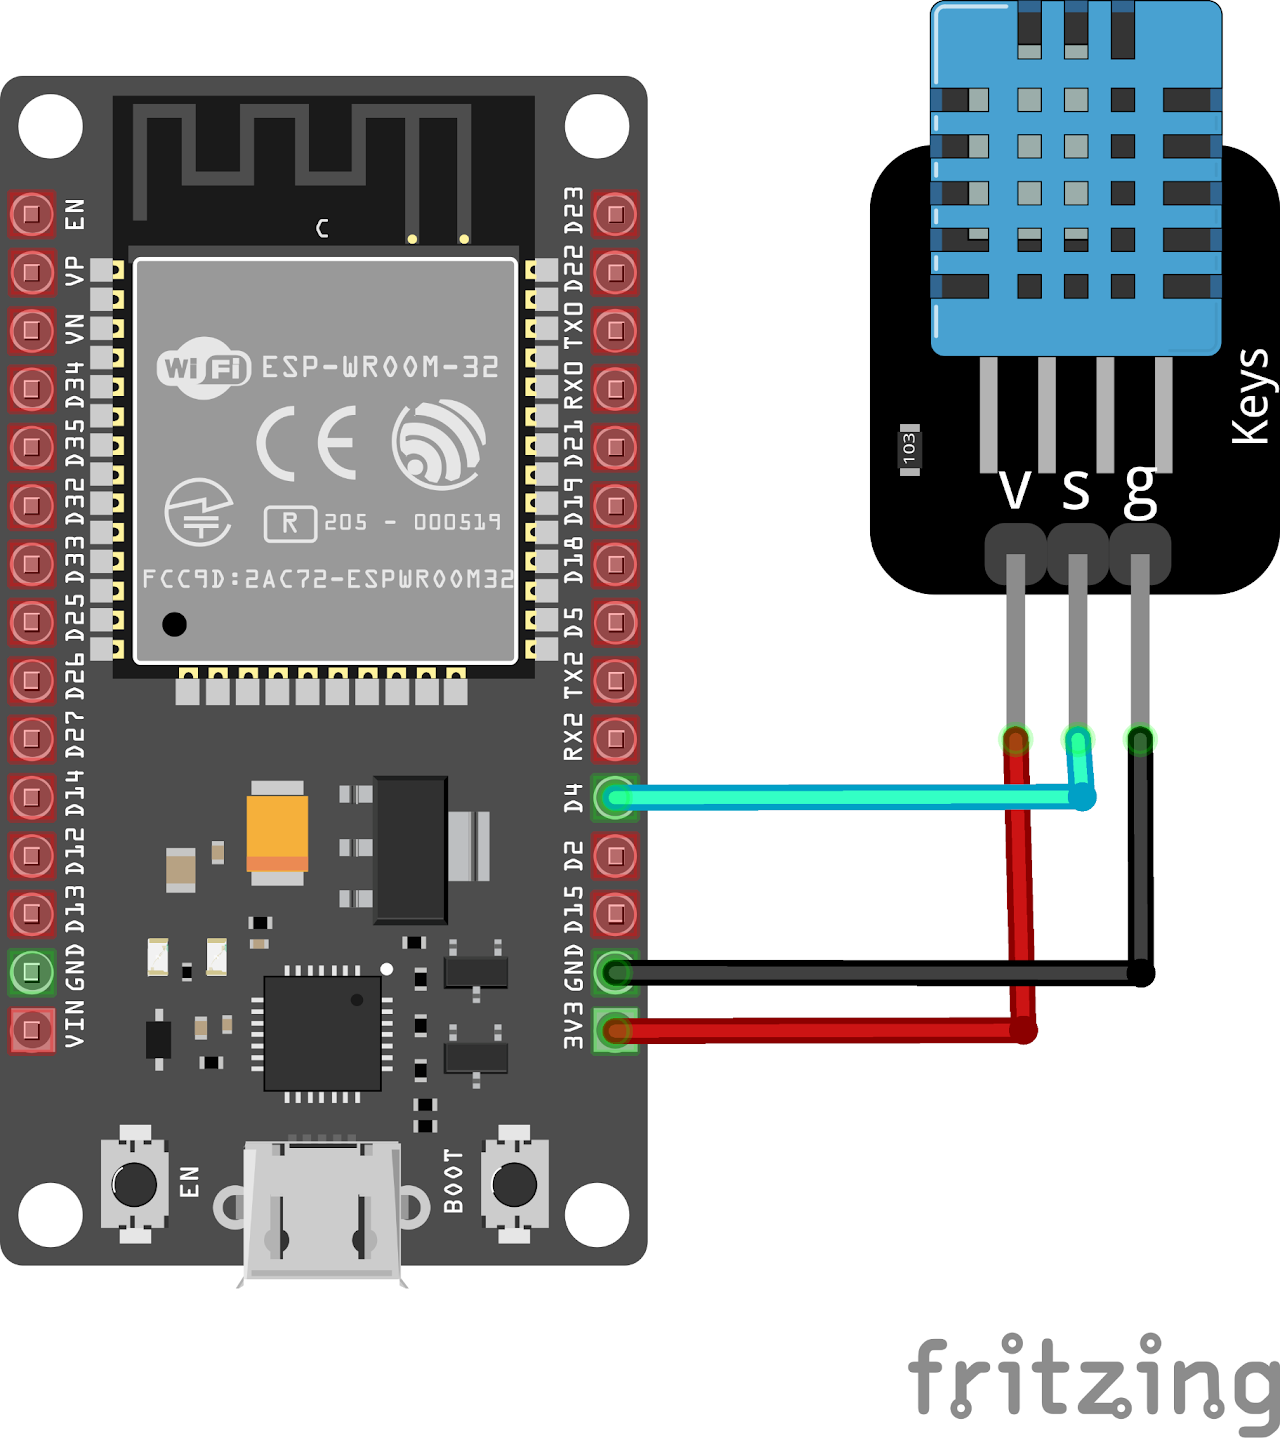
Circuit Diagram
Follow the circuit diagram below to connect the DHT11 sensor with ESP32 development board:
- Connect the DHT11 sensor's VCC pin to the ESP32's 3.3V power supply.
- Connect the DHT11 sensor's GND pin to the ESP32's ground (GND).
- And the data pin (S) to the ESP32's GPIO 4 (D4)
Code:
Now let's understand and write the C code to measure the temperature and humidity. Follow the steps below:
Open VS Code and create a new sample project with the name dht11 (Follow previous guides to see how to do it).
Now navigate to the "Main" folder of the project and then open the Main.c file.
Download the source files, along with the main file for the DHT11, from here into the Main folder. Your project folder should look like this:
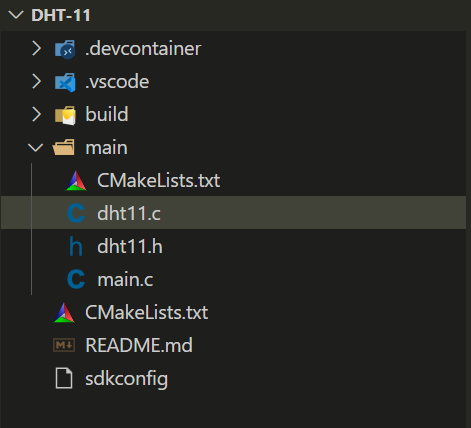
- Main.c contains the following code:
#include "freertos/FreeRTOS.h"
#include "freertos/task.h"
#include "driver/gpio.h"
#include "sdkconfig.h"
#include "dht11.c"

void app_main()
{
    DHT11_init(GPIO_NUM_4);

    while (1)
    {
        printf("Temperature is %d \n", DHT11_read().temperature);
        printf("Humidity is %d\n", DHT11_read().humidity);
        printf("Status code is %d\n", DHT11_read().status);
        vTaskDelay(1000 / portTICK_PERIOD_MS); // Delay 1s
    }
}- Now at the bottom navbar of VS Code select the port, flash method and click on the Build, flash and monitor icon.
Note: During the flashing process of your board, you may encounter an error. If this happens, there's no need to worry. Simply flash the board again and when you see the message "connecting..........." appear, press and hold the boot button on your board for 1 or 2 seconds. Keep holding it until the dots on the screen start disappearing or the further flashing process begins. This action will help resolve any issues and ensure a successful flashing of your board.
Output
After uploading the code to the ESP32, the program will continuously monitor and print the temperature and humidity values from the DHT11 sensor.
Conclusion
By following this guide, you have successfully interfaced a DHT11 sensor with an ESP32 microcontroller. You have learned how to read temperature and humidity values from the sensor and display them on the serial monitor. This knowledge can be applied to various applications such as home automation, weather monitoring, and environmental sensing. Feel free to explore additional functionalities and expand on this project to suit your specific requirements.