Getting Started with Your First Experiment
Introduction
Congratulations on setting up your Raspberry Pi 3B+! Now it's time to dive into the world of coding and electronics. In this tutorial, we'll start by exploring the usage of an IDE (Integrated Development Environment) for programming your Raspberry Pi, and then we'll create a simple program to blink an LED. Let's get started
Problem Statement
The goal of this project is to create a program that will control the GPIO pins of the Raspberry Pi to blink an LED. By completing this project, you will gain hands-on experience with programming and interfacing electronic components with the Raspberry Pi.
Using Geany Python IDE
Geany is a lightweight text editor that is pre-installed on Raspberry Pi, and can be used to code in Python or any other language. It can be found in the main menu, under Programming, with the other developer tools such as Thonny Python IDE, Scratch and BlueJ Java IDE. So, there is nothing to do, with this version it’s available directly.
Open the main menu (top left of your screen), click on programming and then Geany Programmer’s Editor.
Open the main menu (top left of your screen), click on programming and then Geany Programmer’s Editor.

Requirements
- LED
- Raspberry Pi
- Resistor (220-330 ohms)
- Breadboard
- Jumper Wires (M-F)
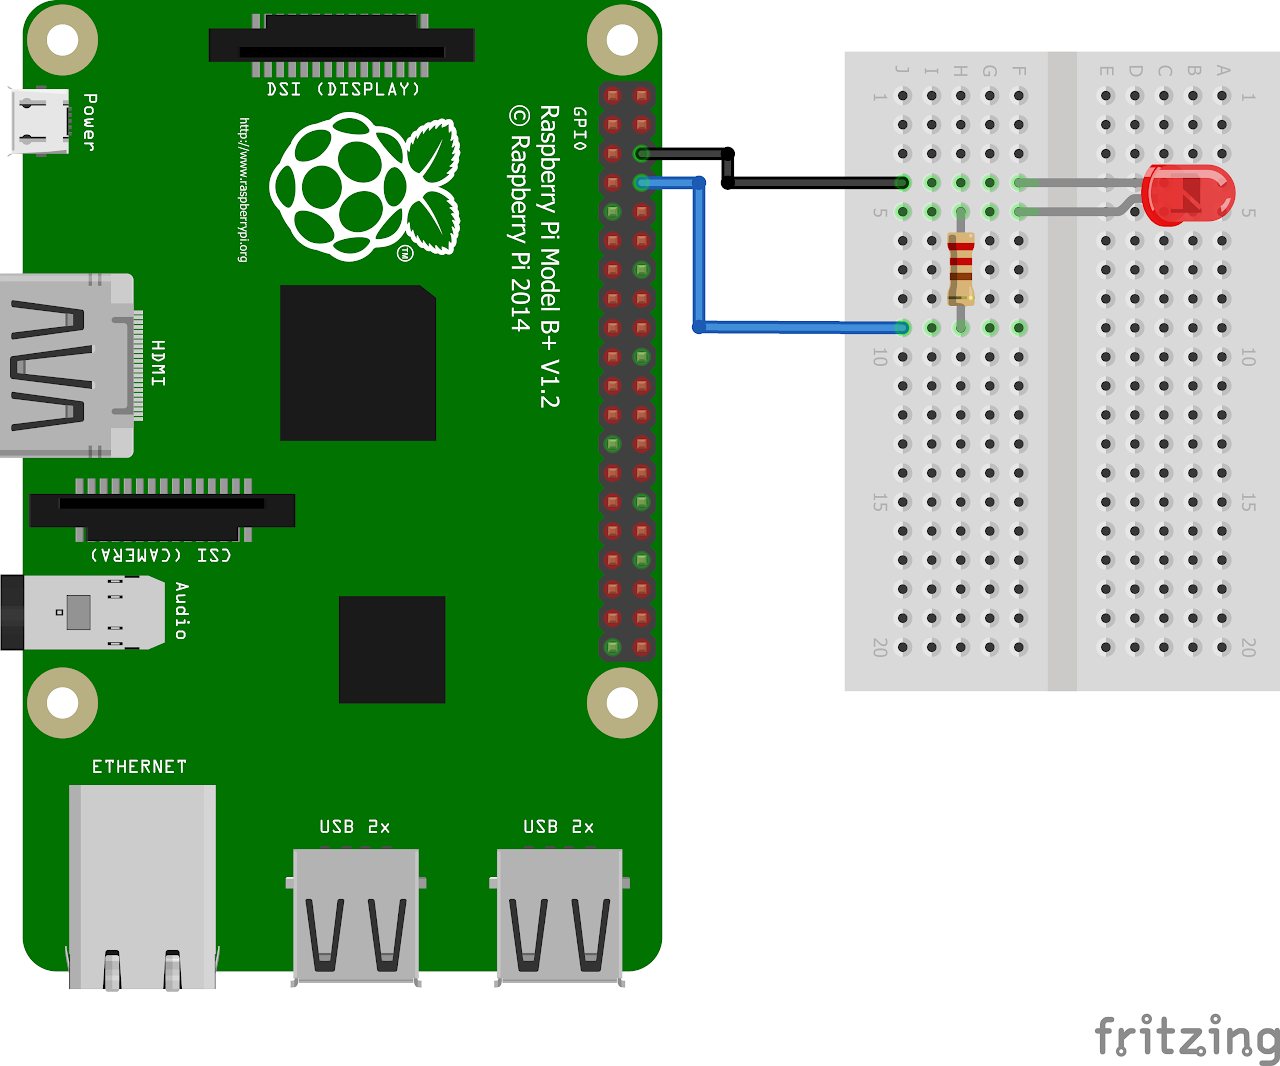
Circuit Diagram
Code
Now let's write the Python code to control the LED and make it blink. Follow the steps below:
- Connect to your Raspberry Pi using VNC or Desktop environment.
- Launch the Geany Python IDE or open a text editor to write the code.
- Create a new file and write the following code into it.
- You can copy and paste the following code from here into the file.
py
import RPi.GPIO as GPIO
import time

GPIO.setmode(GPIO.BCM)          # Set up BCM GPIO numbering
GPIO.setwarnings(False)         # disable warnings
LED_PIN = 14                    # GPIO14 as LED pin
GPIO.setup(LED_PIN,GPIO.OUT)    # set GPIO14 as an output

try:
    while (1):
            # Set LED to ON
            GPIO.output(LED_PIN,GPIO.HIGH)
            print ("LED is ON")
            time.sleep(1)       # wait for a second

            # Set LED to OFF
            GPIO.output(LED_PIN,GPIO.LOW)
            print ("LED is OFF")
            time.sleep(1)       # wait for a second
except KeyboardInterrupt:       # If CTRL+C is pressed, exit cleanly:
      pass
GPIO.cleanup()
Save the file with a suitable name, such as "blink_led.py"
Once you have written and executed the code by clicking on messenger like icon.
Output
Led will turn on for one second and then turn off for one second in an infinite loop until you stop the program by pressing Ctrl + C.