Using an External Switch with Raspberry Pi
Introduction
Problem Statement
Switching on an external led using an external switch utilizing interrupts using a Raspberry Pi.
Requirements
- Raspberry Pi
- External switch
- LED
- Resistor
- Jumper wires
- Breadboard
Working
When integrating an external switch with a Raspberry Pi, you can create a simple yet interactive setup that allows you to control an LED and print interrupt detection messages on the terminal while keeping track of the count. By connecting the switch to one of the Raspberry Pi's GPIO pins, you can monitor its state changes. When the switch is pressed, it triggers an interrupt, notifying the Raspberry Pi of the event. The Raspberry Pi's software can then respond to the interrupt by turning on the LED and printing a message on the terminal, indicating that an interrupt has been detected.
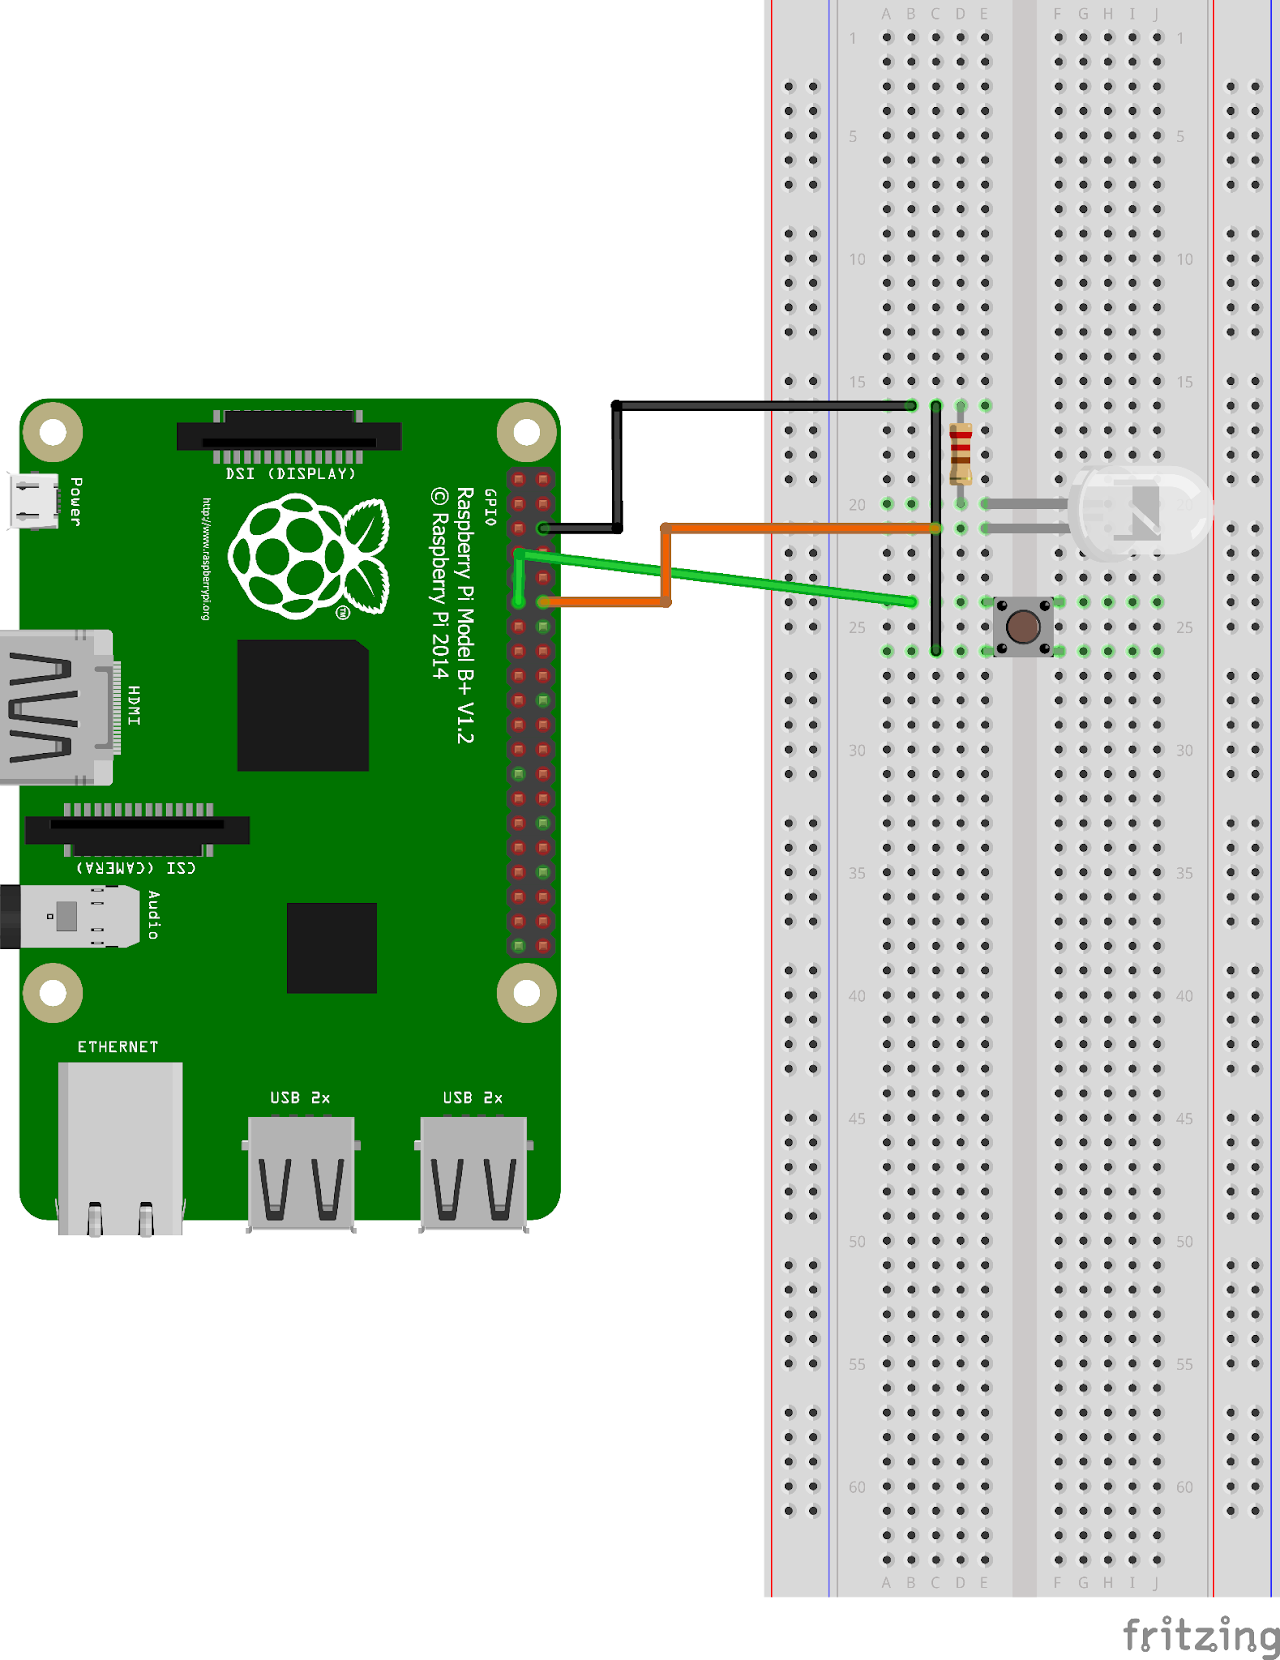
Circuit Diagram
Follow the circuit diagram below to connect position encoder and Raspberry Pi:
- Connect one end of LED to GPIO18(PIN 12) of Raspberry Pi
- Connect one side of push button to GPIO17(PIN 11) of Raspberry Pi
- Connect other end of LED to resistor
- Connect one end of resistor and other end of push button to GND(PIN9) Raspberry Pi
Code
Now let's write the Python code for obtaining ECG values. Follow the steps below:
- Connect to your Raspberry Pi using VNC or Desktop environment.
- Launch the Geany Python IDE or open a text editor to write the code.
- Create a new file named
external_switch_interrupt.pyand save the following code into it - You can copy and paste the following code from here into the file.
import RPi.GPIO as GPIO

# Set GPIO mode and setup the input pin for the switch
GPIO.setmode(GPIO.BCM)
switch_pin = 17  # GPIO pin connected to the switch
GPIO.setup(switch_pin, GPIO.IN, pull_up_down=GPIO.PUD_UP)

# Set up the output pin for the LED
led_pin = 18  # GPIO pin connected to the LED
GPIO.setup(led_pin, GPIO.OUT)
GPIO.output(led_pin, GPIO.LOW)  # Turn off the LED initially

# Define the interrupt callback function

def switch_callback(channel):
    if GPIO.input(channel) == GPIO.LOW:
        print("Switch pressed")
        GPIO.output(led_pin, GPIO.HIGH)  # Turn on the LED

    else:
        print("Switch released")
        GPIO.output(led_pin, GPIO.LOW)  # Turn off the LED

# Add interrupt event detection
GPIO.add_event_detect(switch_pin, GPIO.BOTH,
                      callback=switch_callback, bouncetime=200)

try:
    # Your main program logic can go here
    while True:
        # Perform other tasks
        pass

except KeyboardInterrupt:
    # Clean up GPIO settings on program exit
GPIO.cleanup()- After saving the file execute it by clicking on messenger like icon on geany editor or open terminal and navigate tothe folder you saved the file, execute it by typing python
external_switch_interrupt.py
Output
The led switches on when the switch is pressed and led switches off when switch is released. When switch is pressed, the corresponding message will be printed in the Terminal as well.