Installation of Software
A. Raspberry Pi OS Installation
Follow the step by step process to install and set up Raspbian OS on your Raspberry Pi.
Step 1: Download the Raspbian OS
Download the following .zip file of compressed Raspberry Pi OS. Right-click on the hyperlink and select Save Link As… option to download
rpi_image.zip (1.72GB)
Note: For the above file, the browser might warn that the file can harm your PC, but it will not and you can safely download it.
Extract the zip file and you will get the file named rp_image.img of size 14.8 GB.
Step 2: Download required Software
- Install the Raspberry Pi Imager software according to your OS (Windows/Ubuntu) from this link
- Open the downloaded .exe/.deb file and follow the steps to install the application.
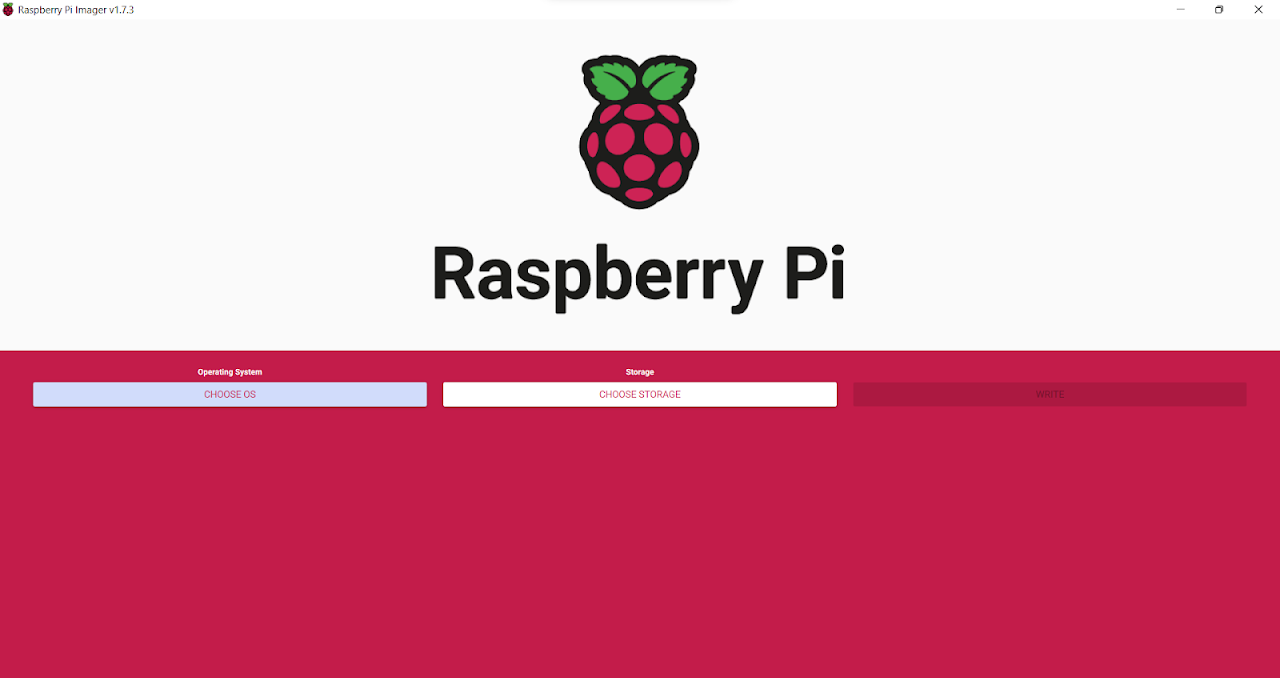
- Open the application and if the installation is successful, you will be able to see a window as shown below.
- Install the VNC Viewer software according to your OS (Windows/Ubuntu) from this link
- Open the downloaded .exe/.deb file and follow the steps according to this [ Select language as English → Accept the terms in the License Agreement → Choose the location (leave it as default) → Install → Finish]
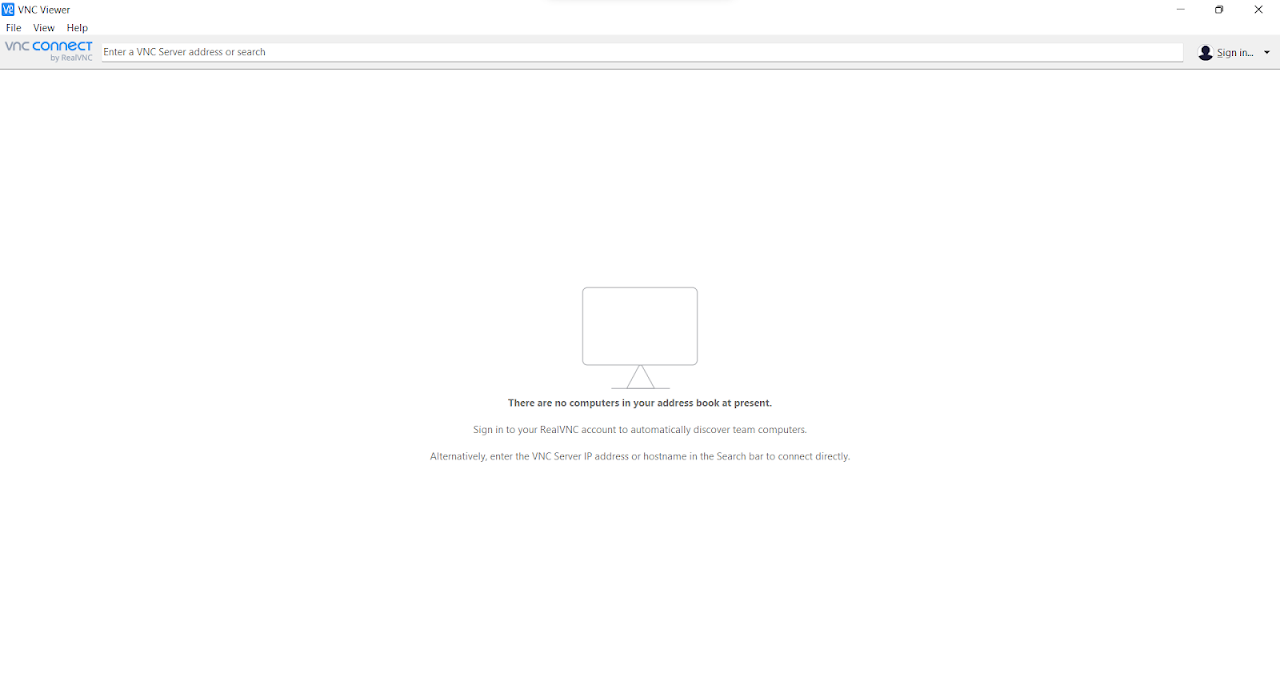
Open the application and if the installation is successful, you will be able to see a window as shown below.
- Now you have installed the required softwares.
Step 3: Download the Raspbian OS to Raspberry Pi
- Insert the SD card (provided in the kit), to the SD card slot of your laptop. If your laptop does not have SD card slot, use the SD card reader (provided in the kit).
- Open the Raspberry Pi Imager
- Go to first option CHOOSE OS and follow these steps:
- Use custom (last option) → Browse for the image file rp_image.img (which was downloaded in Step 1)
- Go to the second option CHOOSE STORAGE and select the SD card (16GB).
- Once these are selected, you should be able to see a settings icon to the bottom right side of the Raspberry Pi Imager screen. If not visible, you can press “ctrl+shift+x”. This will open up a settings menu.
- Use the settings as shown in figure below.
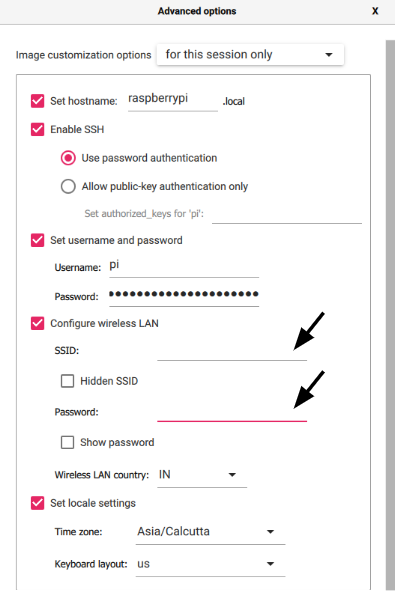
- You can give Username: pi and Password: raspberry (or any other username and password but ensure that you remember the details since this will be required later)
- For Configuring wireless LAN, you should choose the network carefully.
- Ensure that you use a network of bandwidth 2.4 GHz.
- At later stages you will have to connect both your laptop and Raspberry Pi to the same network. Hence you can use any WiFi or Mobile Hotspot (eg: from your phone) to which you can connect both devices. Hence use a common network [mandatory] for your Laptop and Raspberry Pi.
- Use a network from which you will be able to retrieve the IP addresses of the connected devices.
- Once you have chosen the network, give the name of the network in the SSID field. The password of the network should be given in Password (below SSID).
- For example, if you are using your mobile hotspot, the name of the hotspot (from your phone) is the SSID and the password of the hotspot is Password.
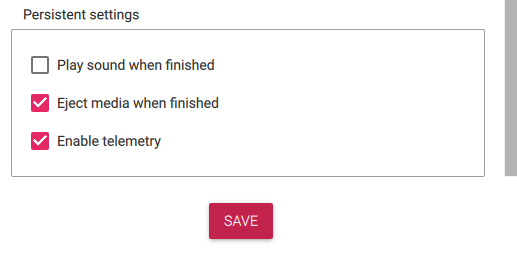
- Now save these settings and press the Write button. Now the OS will be flashed to the SD card. This step will take some time to finish.
- Once the writing is completed, you can remove the SD card from your laptop.
Step 4: Configuring the Pi
- Insert the SD card into the Raspberry Pi as shown below.
- Now power up your Pi by connecting it to power supply using the provided 5V adapter. Now you should be able to see a Red light and a blinking Green light on the Pi. This means that Pi is now switched ON.
- IMPORTANT
- Kindly go through this blog 63 before going any further.
- The Green LED which is labelled as ACT indicates SD card activity and Red LED which is labelled as PWR indicates Power Status of Raspberry Pi.
- If the Red LED fails to light or flashes it indicates that there is a problem with the power supply.
- IMPORTANT
- Now open the network which you had given as SSID. In a short time, you will be able to see your Pi connected to that network. (with the name “raspberry”). Note down the IP address of the Pi. Connect your laptop also to the network.
- You can now verify the connection using the ping command. (ping raspberrypi.local)
- Now open the Command Terminal and give the command ssh pi@raspberrypi.local. If prompted with “Are you sure you want to continue connecting?”, type yes and press Enter.
- Note: In case of getting any error at this step due to DNS Spoofing, you can solve this easily. Refer this: 31.
- When prompted for password, give the password as raspberry (or custom password set by you) which was set in the previous step. Now you will be in the raspberrypi terminal.
- Enter the command sudo raspi-config.
- In the options window that opens up, do the following: [Select the option Interface Options using down arrow key → Again using down key select VNC → For Would you like the VNC Server to be enabled?, select Yes → After this, a message will be shown The VNC Server is enabled, hit Enter → Now you will go back to the options menu which was shown initially → Choose the option Finish (using tab key) and press Enter]
- Now you have enabled VNC in your Raspberry Pi.
Step 5: Accessing Pi Desktop
- Open the VNC Viewer application which you had downloaded in Step 2
- Enter the IP address of your Pi in the field given “Enter a VNC Server address or search” and hit Enter.
- In the Identity Check window, select the Continue option. Enter the Username and Password as pi and raspberry respectively. Check the remember password option and select OK.
- Now you will be able to access the Raspberry Pi Desktop.