Interfacing Push Button with P89V51RD2
Introduction
In this detailed guide, we will walk you through the process of using a push button to control an LED on a P89V51RD2. The objective is to make the LED turn on when the push button is pressed and turn off when it is released. Following this guide will teach you how to wire the push button and LED to the P89V51RD2 and write a C program to control the LED based on the button's state.
Problem Statement
The goal is to create a circuit that allows us to control an LED using a push button. When the button is pressed, the LED should turn on, and when the button is released, the LED should turn off.
Requirements
- P89V51RD2
- Breadboard
- LED
- Push button
- Resistor (220-330 ohms)
- Jumper wires
Circuit Diagram
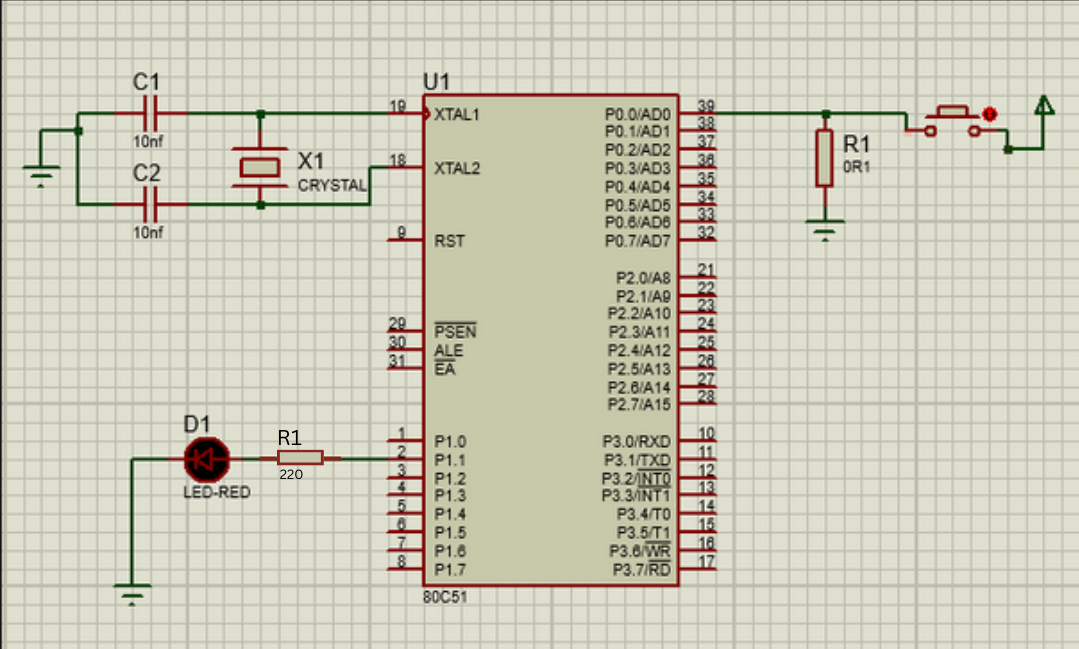
Code
- Copy and paste the following code into main.c or download it from here:
c
#include <reg51.h>

sbit button = P0^0;
sbit led = P1^1;

void main()
{
    P1 = 0x00;  //assigning as output port
    P0 = 0xFF;  //assigning as input port
    while (1)
    {
        if (button == 1)    //if button is pressed, led is on
            led = 1;
        else if (button == 0) //if button is not pressed, led is off
            led = 0;
    }
}
Output
Led will turn on when you press the push button and turn off when the button is released in an infinite loop until you stop the program.
Conclusion
In this tutorial you have successfully learned how to use a push button to control an LED on a P89V51RD2 Development board. You have wired the components, written the C code, and gained the ability to turn on the LED when the button is pressed and turn it off when the button is released. This project opens up a wide range of possibilities for incorporating buttons into your P89V51RD2(8051 Microcontroller) projects. Have fun exploring and experimenting with different applications of push-button control.