Installation of software
This guide provides a step-by-step approach to installing the ESP-IDF (Espressif IoT Development Framework) extension on Visual Studio Code (VS Code). By following these instructions, you will be able to set up a seamless development environment for ESP32 microcontroller projects, enabling efficient and productive IoT development.
What You Need
Hardware
- An ESP32 board.
- USB cable - USB A / micro USB B.
- Computer running Windows, Linux, or macOS.
Software
- VS Code
Installation Steps
- Download and install Visual Studio Code.
- Open the Extensions view by clicking on the Extension icon in the Activity Bar on the side of Visual Studio Code.
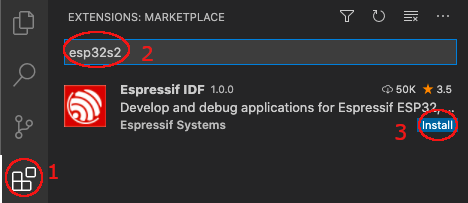
- Search the extension with any related keyword like espressif, esp-idf, esp32, esp32s2, etc.
- Install the extension.
- In Visual Studio Code, select menu "View" and "Command Palette" (or press Ctrl + Shift + P) and type "configure esp-idf extension". After, choose the ESP-IDF: Configure ESP-IDF extension option.

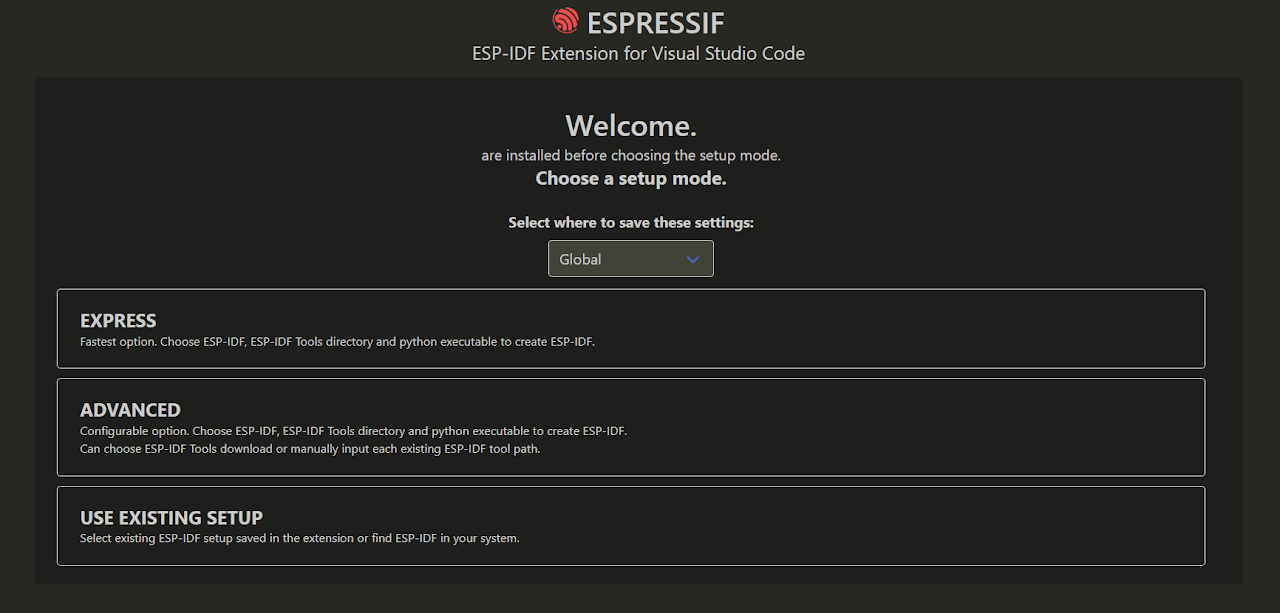
- Now the setup wizard window will be shown with several setup options: Express, Advanced or Use existing setup.
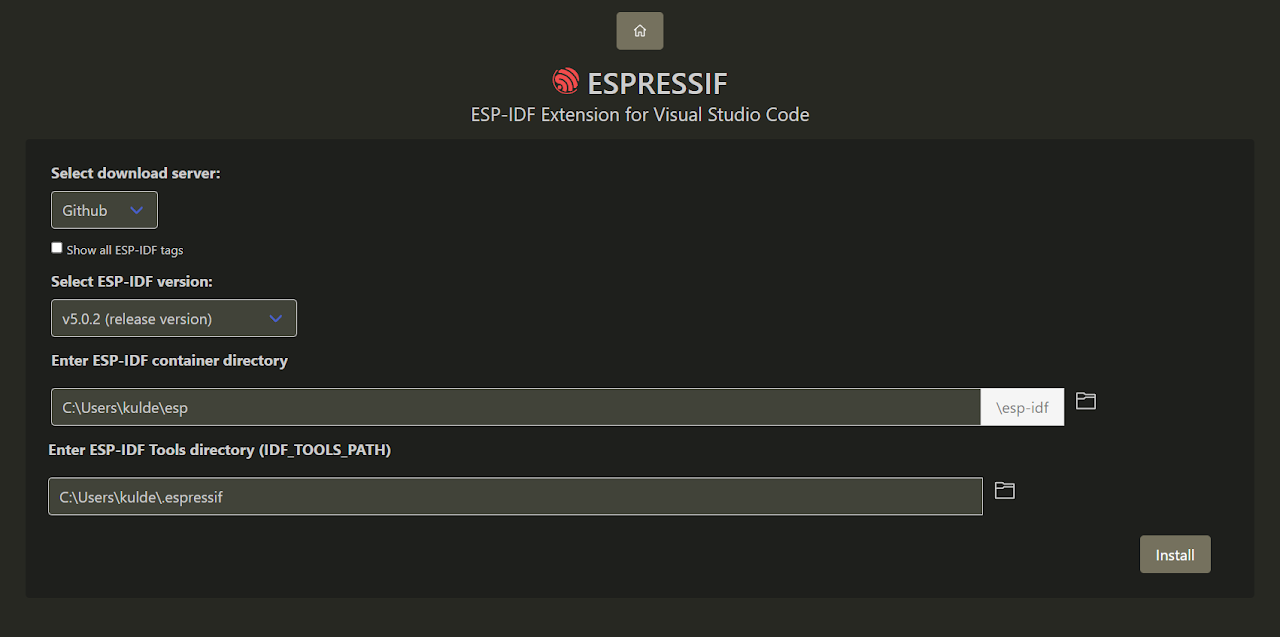
- Select the Express option and pick v5.0.2 ESP-IDF version to download and click on "install".
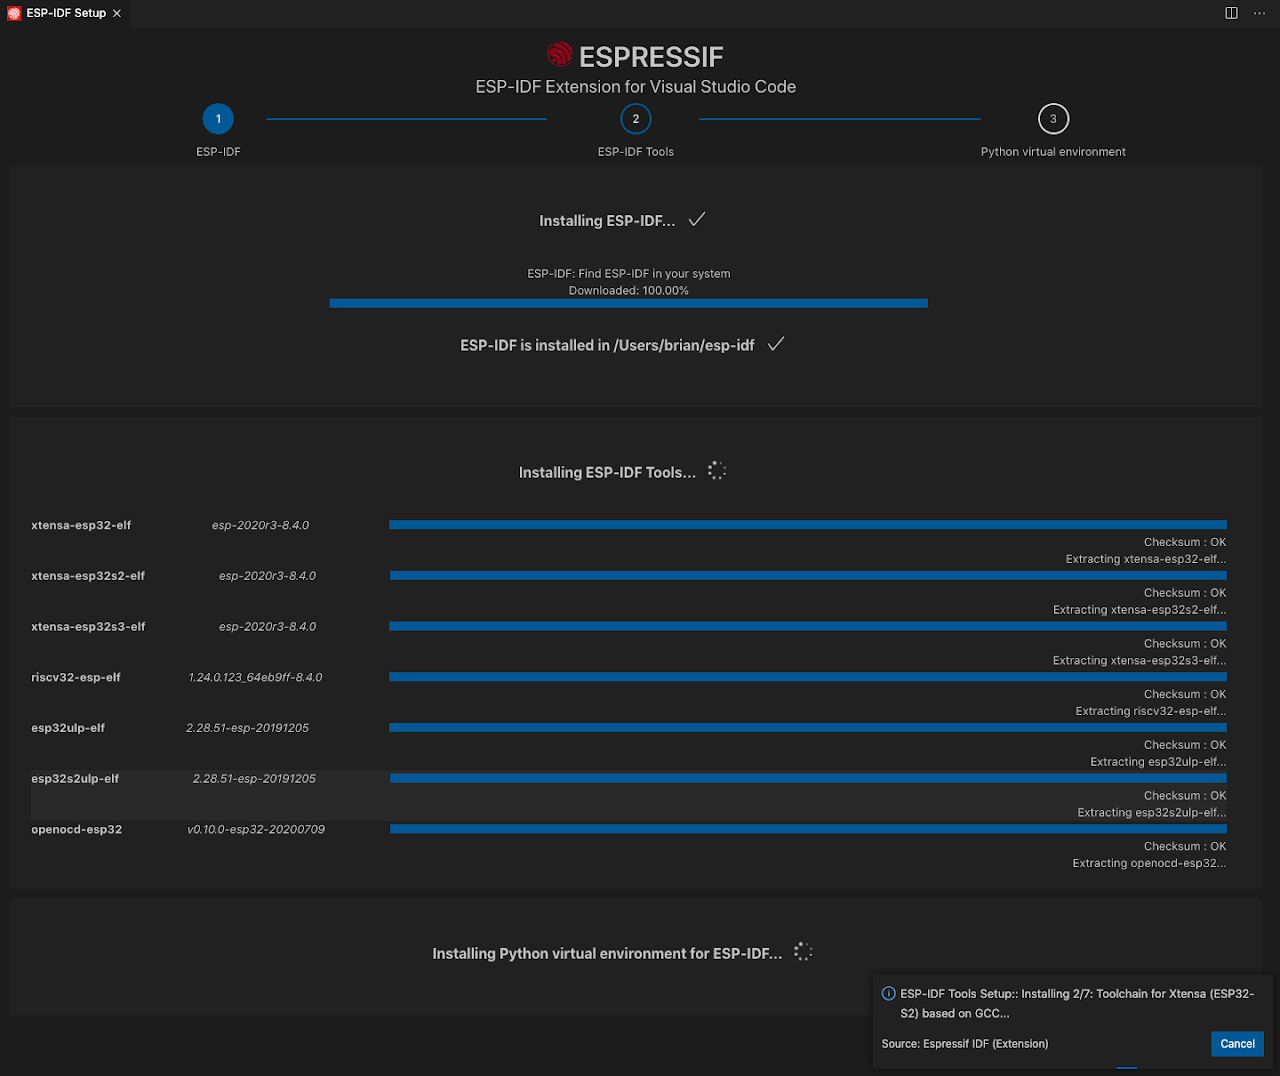
- Now you will see a page showing the setup progress status showing ESP-IDF download progress, ESP-IDF Tools download and install progress as well as the creation of a python virtual environment.
- If everything is installed correctly, the user will see a message that all settings have been configured. You can start using the extension.
