Interfacing BME280 Sensor with Raspberry Pi
Introduction
Problem Statement
The objective is to create a circuit using a BME280 sensor that can detect temperature, pressure and humidity in the vicinity.
Here we will print 20 readings taken with a time interval of 0.1s. Each set of reading will be printed as a dictionary and all the 20 readings will be printed as a list.
Requirements
- Raspberry Pi
- BME280 sensor module
- Jumper wires
Working
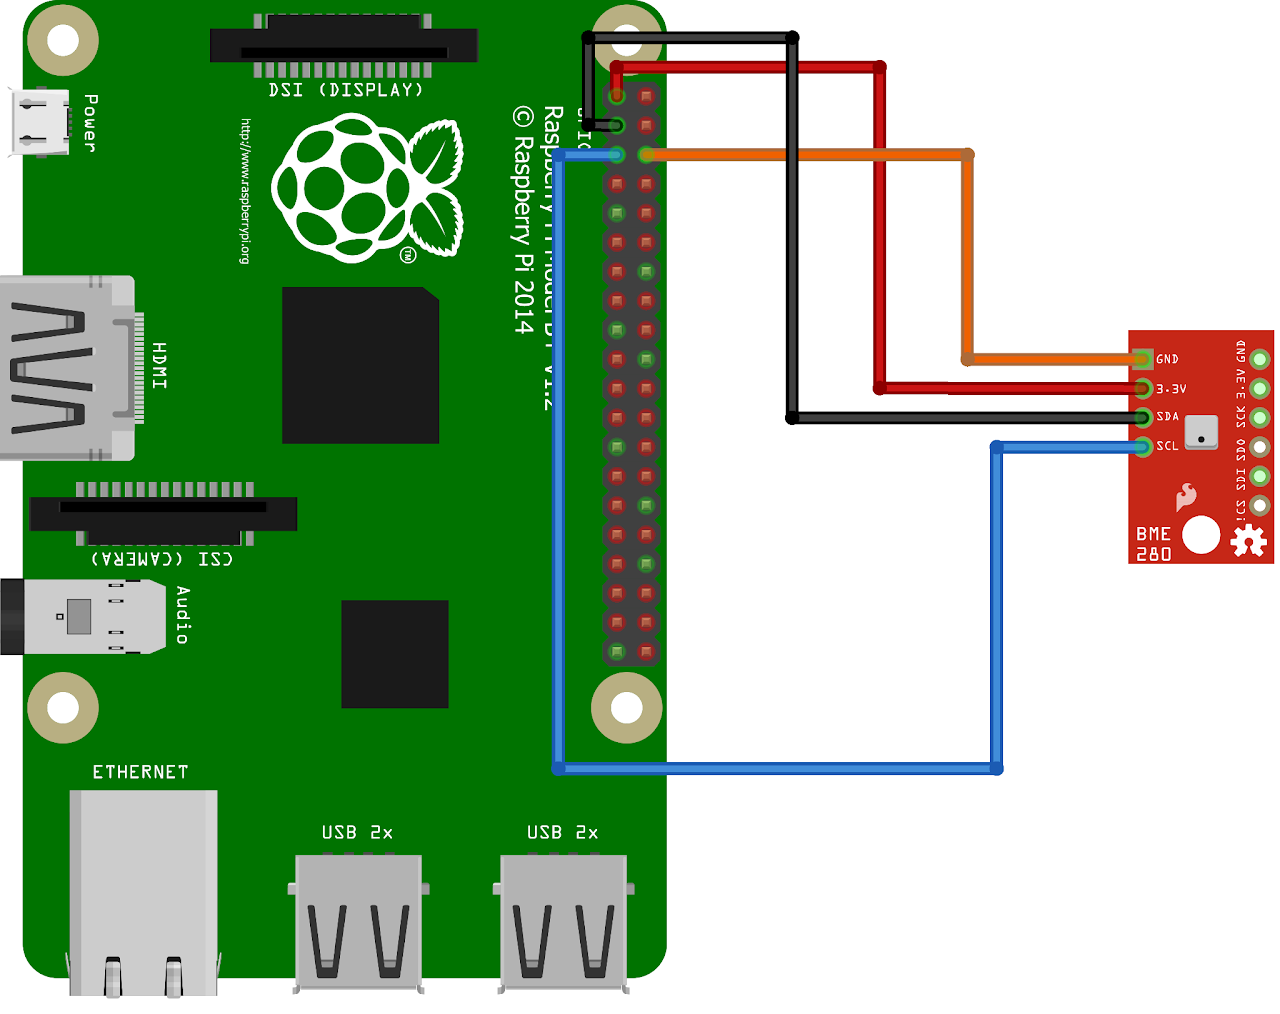
Circuit Diagram
- Connect the 3.3V of BME280 sensor to 3V3 power (Pin 1) of RPi
- Connect the GND of BME280 sensor to GND (Pin 6) of RPi
- Connect the SDA of BME280 sensor to GPIO2 (Pin 3) of RPi
- Connect the SCL of BME280 sensor to GPIO3 (Pin 5) of RPi
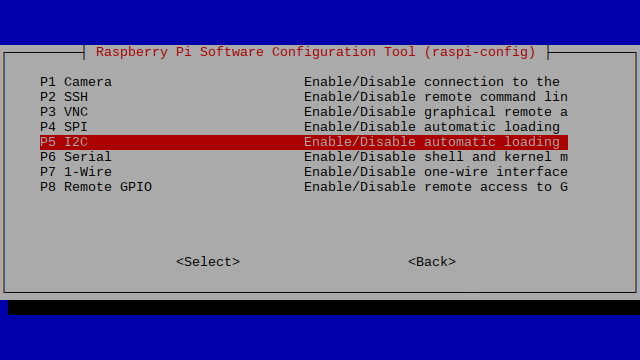
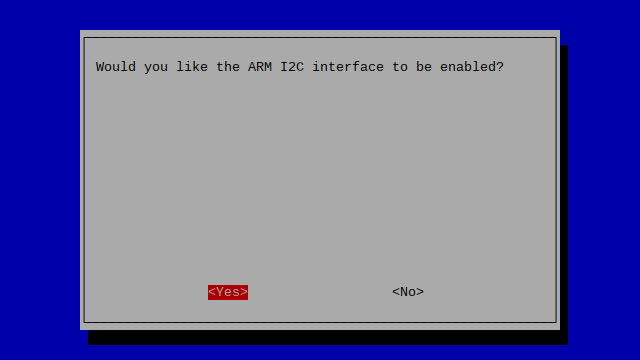
Enabling I2C
Open the terminal and run the command sudo raspi-config and follow the given steps
While you are within this tool, you can use the ARROW keys to navigate and the ENTER key to select.
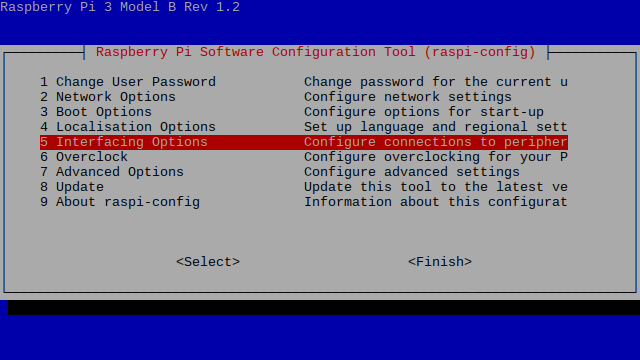
Navigate to FINISH and press ENTER.
For our changes to take effect, we need to restart our Raspberry Pi. To restart the Raspberry Pi, all we need to do is use the command below.
sudo rebootI2C is enabled.
Installing Libraries
- Open the terminal
- Update the package list then upgrade the packages, by using the command
sudo apt-get update && sudo apt-get install -y python-smbus i2c-tools- Once everything is downloaded, shut down the RPi and restart again. Then we need to install the BME280 library for RPi
pip install bme280piCode
Now let's write the Python code to get temperature, humidity and pressure in a vicinity. Follow the steps below:
- Connect to your Raspberry Pi using VNC or Desktop environment.
- Launch the Geany Python IDE or open a text editor to write the code.
- Create a new file named bme280.py and save the following code into it
- Open the raspberrypi terminal and install the Adafruit_MCP3008 using
pip install Adafruit_MCP3008command. - Open the raspberrypi terminal and install the SMBus using
pip install SMBuscommand. - You can copy and paste the following code from here into the file.
import time
import datetime
from bme280pi import Sensor

sensor = Sensor()

measurements = []
number_of_measurements = 20

for i in range(number_of_measurements):
    measurements.append(sensor.get_data())
    time.sleep(0.1)

print(measurements)- After saving the file execute it by clicking on messenger like icon on geany editor or open terminal and navigate to the folder you saved the file, execute it by typing python
bme280.py
Output
The BME280 sensor provides three outputs temperature, humidity, and barometric pressure with Raspberry Pi.